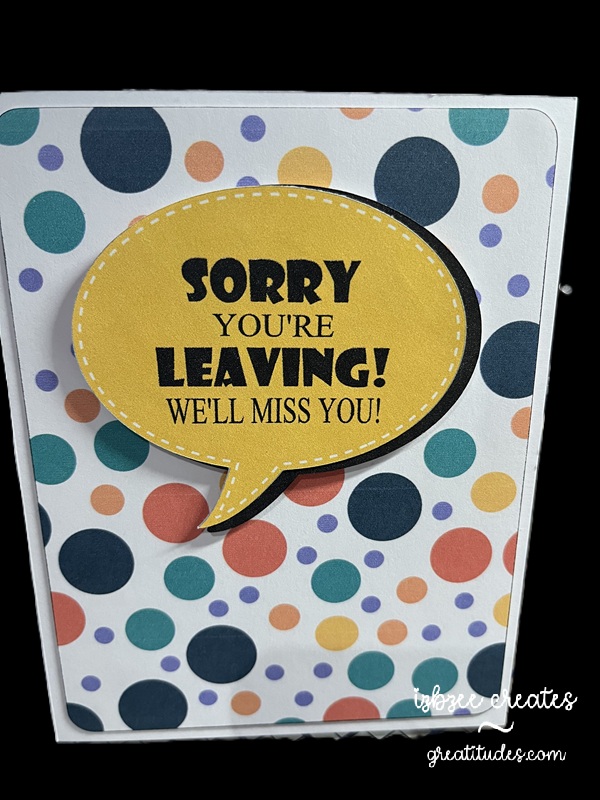
This was a Pinterest inspiration. There are days that something just fits the bill and doesn’t take all day to create. This was one of those quick and easy projects…..
Talk bubble shape is from the SCAL library. Created an inset shadow and changed the outline to dashed. Added another shadow at .075 to go behind the talk bubble. I decided that I would add this as an additional element rather than just having a single layer print and cut… though I think that would work nicely as well. The background paper for the rounded large rectangle was from Creative Fabrica – though I’m not sure it’s still available as I purchased the collection several years ago. The fun font is from Adobe. It’s fun to use more than one font and size for this sentiment.
The bubbles and rectangle are filled with color and pattern and then sent to the printer. Cut using the SCAL 6 software with the Skycut C24 plotter. I really do like my cutter. Print to cut is generally spot on and I don’t have to add a bleed to the shape so ensure an accurate cut.
Hoping you’ll have some time to spend in your creative space soon! Have a great day!
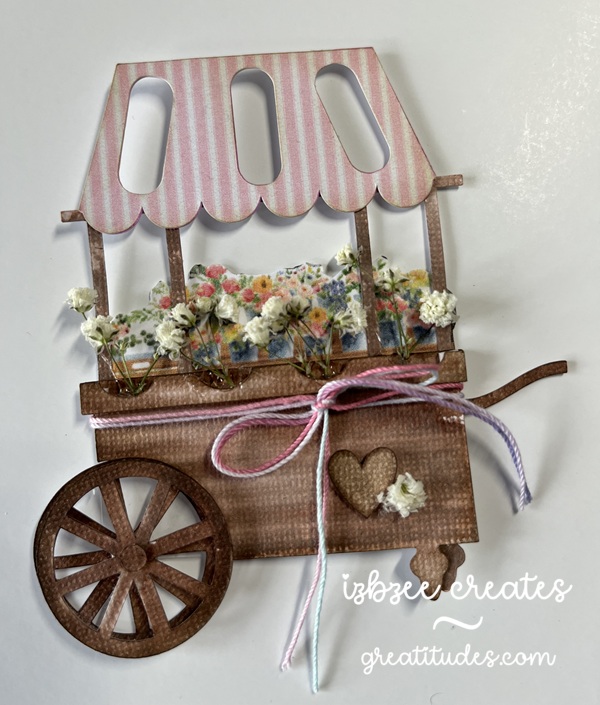
Day3: This was a fun tag to create for the final day of the reveal. All of the foundational pieces were designed in SCAL 6. The digital paper used for the awning of the cart is from NitWit Collection’s Porch Swing Fat Quarter Collection. Print then Cut was so easy and I really like the look. I doubled up that piece and the under piece was colored with some brush watercolor markers in a slightly darker colored pink.
The cart is a pretty fun process and the front wheel is on a mini spinner and that adds a little surprise after using some watercolor maker brushes to add some color and depth. The digital flower strip is from an element in the ephemera collection in Carta Bella’s Spring Market files. I resized the image a bit to fit in the cart. I added some baby’s breath as well. The hot glue almost looks like water in the wells that hold the stems.
Foam tape Bearly Art Glue Mini Spinner Baby’s breath
All but the floral strip were cut using the SCAL 6 software and Skycut C24.
Enjoy a creative day! Take care and have some fun!
For the last 5 or so years, one of the Facebook groups I belong to has been celebrating the arrival of Spring with a Spring Tag Reveal. This year is no exception — in years past, we’ve done anywhere from 3 to 5 tags… this year, we’re doing 3.
It’s looking like Shabby Chic will be my theme for this season’s tags. I used a couple of digital collections in my stash and some inspiration from Pinterest. I did purchase a file for today’s tag from Etsy and resized 2 of the pieces to form my tag.
DAY1: Layered looks are always fun! Digital paper selections are from the Porch Swing Fat Quarter Collection from Nit Wit Collections provided the patterns for this layered tag. The edges of each layer is inked with Oatmeal Cookie from FSJ (retired) and some foam tape was used to pop the top layer of the tag up. Bearly Art glue was used to adhere the bottom two layers of this tag together. Cotton crochet thread was used for the hanger.
Looking forward to sharing the next two tags over the next two days. Hoping you’re carving out some creative time on a regular basis. Have some fun!
It’s been a crazy couple of weeks around our place… thus the cuckoo title. Me thinks the cuckoo flew the coop! Oh well, on with the make. I’ve gotten out of the habit of late taking pictures of the progress, so we’ll just have a couple.
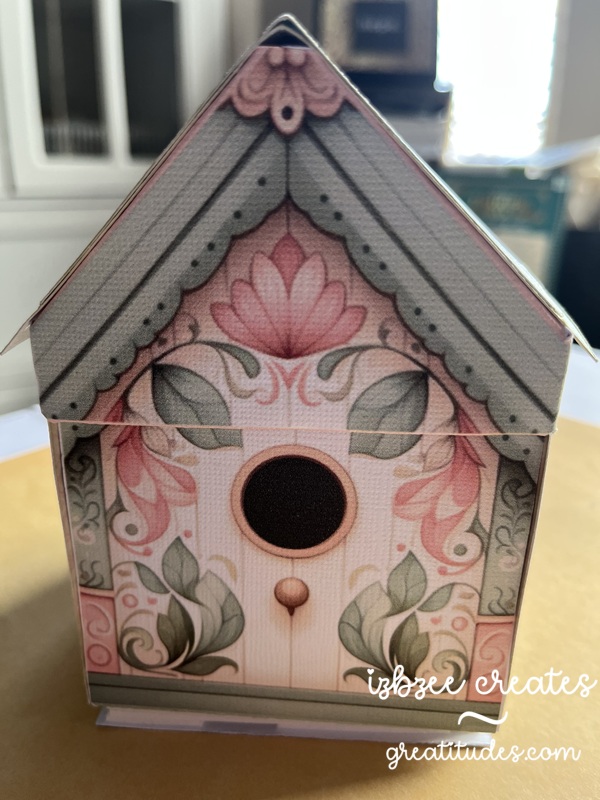
I did add a sound module from Invite By Voice to this make from Emma Parrish – you can find her shop on Etsy — and it’s really kind of fun to listen to when you open the box and look through the flaps and pockets. I didn’t follow her design exactly, but pretty closely. The audio was a find on Pixabay… yep, they have audio files and video files too!
TIP: You do need to pre-print the backs of each sheet before cutting. I did have to do a little redraw on a few shapes for a clean cut in SCAL — the jpgs just didn’t trace well – and that is a drawback to SCAL on some things especially if there are light lines on the image. I chose not to do the preprint on the back, but did print a separate sheet and cut the shapes. It worked well and gave my box a little more stability in the base and on the side walls.
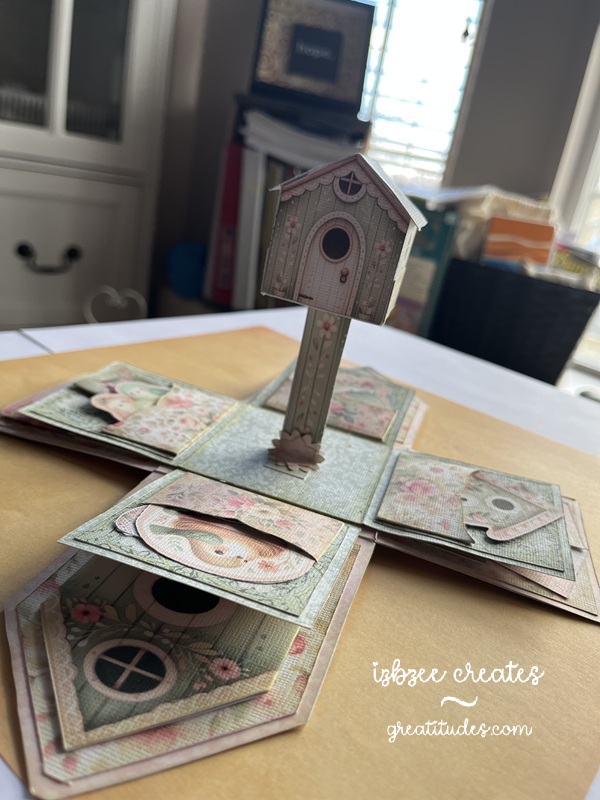
That birdhouse in the center of the base does stand on it’s own. I changed out the flowers in the kit and used a flower punch. You do need at least 2 layers on the flower for extra strength at the base of the post. While you can’t see it in the picture, there is a Nuvo drop center in the flower for a little extra detail. Each of the images in the pockets are provided in the kit. And there were a few extras left over.
Even on selecting BEST for printing, the colors are a bit muted and vintage looking. I like that. The design is well thought out. She has lots of printable designs in her shop.
I wonder if the cuckoo will find it’s way home again?
where’s the cuckoo?
Additional materials: AC and Encore cardstock (textured white) Printer Bearly Art glue – fine tip applicator bone folder foam tape Sound module (light activated) from Invite By Voice mp3 audio file (freebie from Pixabay) Distress Ink (Old Paper) blending tool
Hoping you’ve got some creative time inked in on your agenda for the coming week. Have some fun and nurture your heart along the way.
These Pinterest inspired cards were so fun to make and the last projects for January 2026 that I can publish at the moment! 🙂 Just waiting for a few more things to get to their recipients.
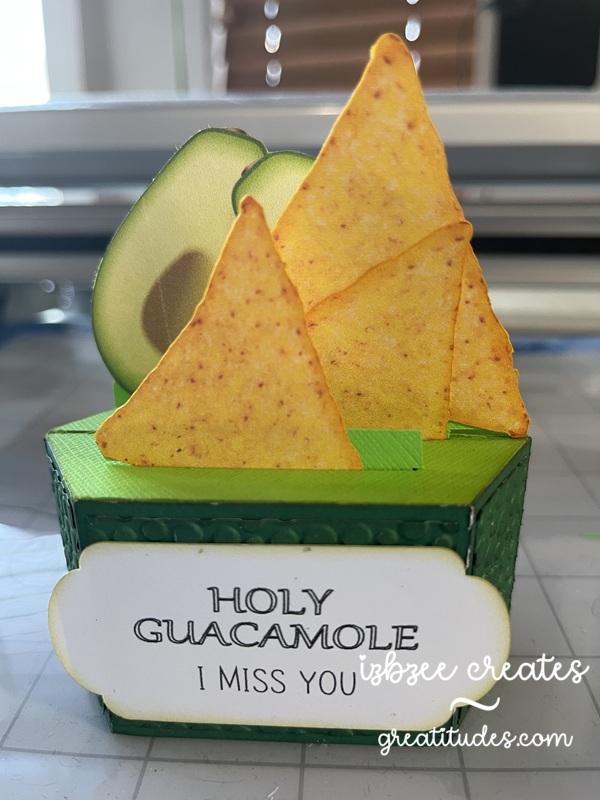
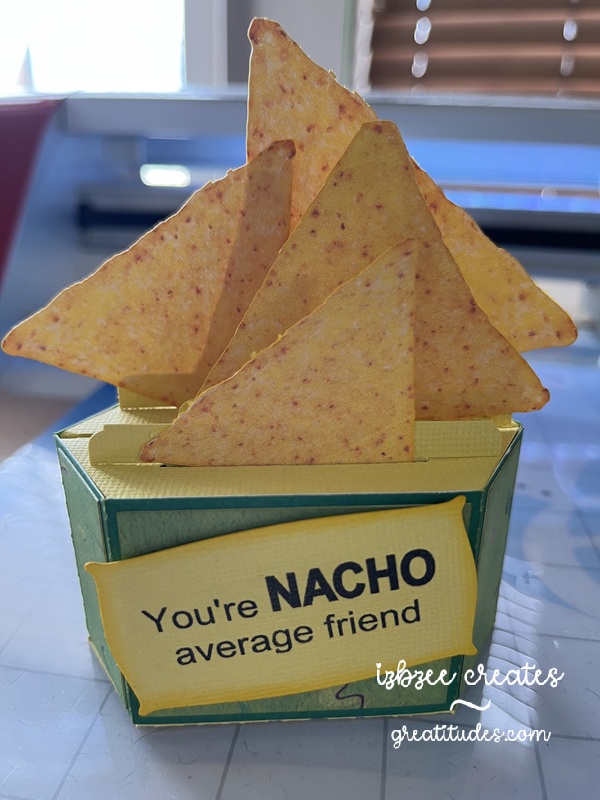
The base for this hexagon shaped box card is adapted from the Valentine Gnome Box Card from Simply Crafty SVGs. I trimmed off the top edge of the base and the extensions on the insert risers. Easy to accomplish in the SCAL software using the knife. Close the path once you’ve completed the slice and removed the unwanted piece. Make sure you re-group any pieces with score lines.
The “realistic” chip and avocado images are a find on freepik.com. They come with a white background – if you want a transparent background you can opt for the premium version and pay for a subscription to the site. HOWEVER, you can eliminate the white using the Paint app in Windows. Choose layers, hide the white. A white background will still show. Then choose the icon for removing the background. The white should disappear, leaving a transparent background behind the chip. I used the eraser and removed the shadow under the chip for a cleaner image. Save As a png and then you can import the file into SCAL. The cut is pretty clean. No TRACE needed since your image is a png. There are lots of other software/app options as well that will remove the background from the image. The above is what I used for this project. The edges of the cut chip images were inked with some yellow orange ink for some added “powdered cheese.” The process is basically the same for the avocado if you choose to add it.
The labels are found in the SCAL library. No shadow layer was added. The fonts used are from the fonts folder on Windows — and were set to print only in the SCAL software after they were sized and centered in the label.
AC Cardstock, Bazzil, Sabor and an old two tone green (source unknown) sheets were used to create the box and inserts. I did use the Tiny Bubbles embossing folder (Provo Craft – retired) to add some texture to the Holy Guacamole box panels. Added a little ink to add some additional interest.
Other materials: bone folder Bearly Art Precision glue printer Skycut C24 SCAL 6 Pro
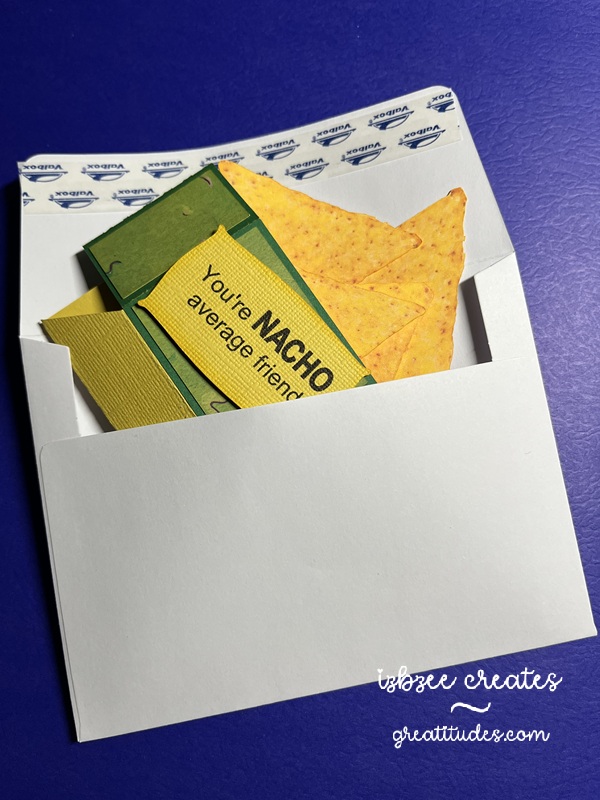
The card when folded flat will fit into an A2 invitation envelope.
Hoping you have some creative time carved out in the coming week! Enjoy every moment! Nurture your creative spirit and heart as well.
this year was a bit different than previous years’ reveals. I wasn’t able to finish all 12 tags due to illness… so instead of doing several different posts this year, I’m going to do just a couple. So let’s get started:
Lots paper piecing this year — most files were already on the computer, found for free online or inspired by something on Pinterest.
This first tag is a go cup – all the facial features were created using simple shapes in SCAL. Love being able to use up a ton of scraps as well this year. The embossing folder is from Crafter’s Companion – likely retired by this point in time.
I’ve always liked this bear stamp — I’ve used it for several different projects including birthday cards. For this tag, I added some digital paper from an old Echo Park collection and a bit of the paper yarn I made last fall. The sentiment is foil quilled and the SCAL software makes it to easy to complete a print to cut; foil to cut project!
A third tag is a fun piece — I’ve created something similar a couple of years ago, but I do like this version of the “peeker”. A little bit of ribbon, some Nuvo drops and a white paint/gel pen for details. Fun way to use your scraps again.
Using a file for a laser ornament — the file was from Creative Fabrica. Super easy to do and I just used 2 extra layers of paper to get the look I was after. All paper is from AC cardstock – with texture.
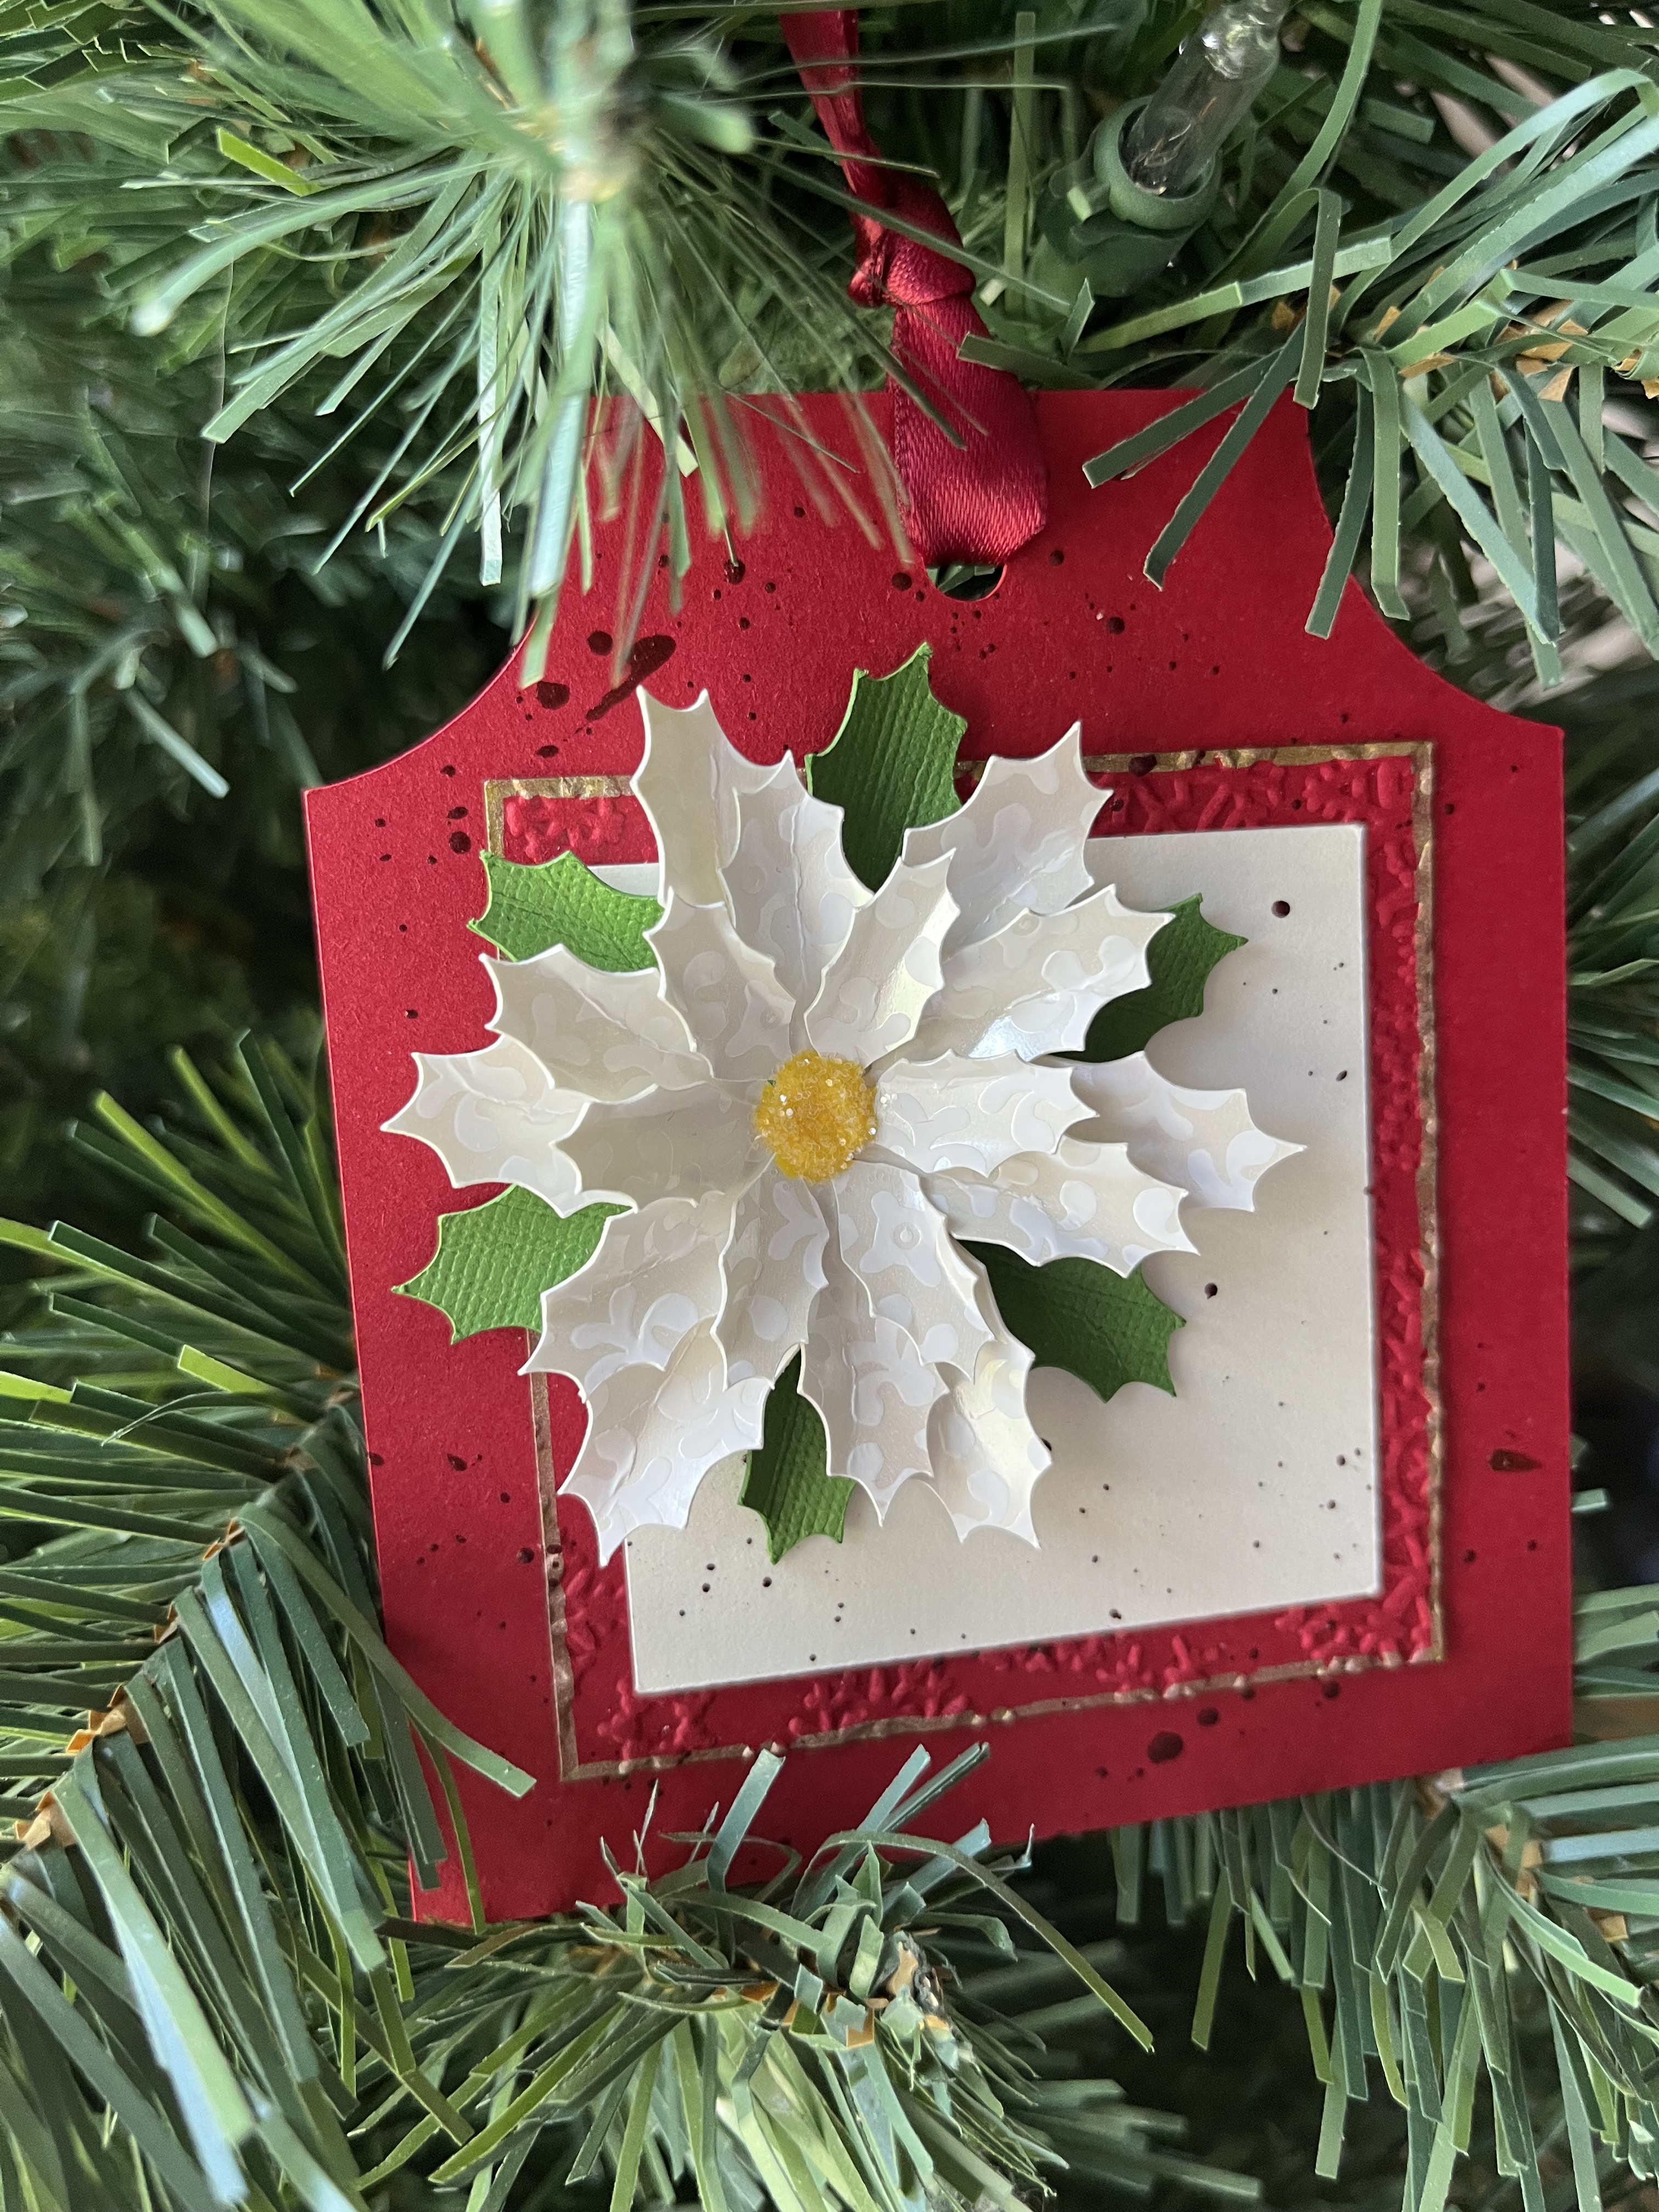
Poinsettia’s are a favorite of mine… they come in all sorts of colors and I thought that the white on white would be a perfect way to display this one. The file is from Maison Gregoria, reduced in size to about 2 inches across finished. Tag shape is made from simple shapes and a little bit of gold pen on the panel edge adds a little more texture to this tag.
We’ll stop there for now…. Just a few more to go and I’ll share those tomorrow.
These got put together pretty quickly. T was needing something for his “team of 25” at work. These were pretty easy to put together in SCAL — I did however forget how heavy all those apples would be — and that T would need to pack them about 1/2 mile into his office from the gate — We did find a way to pack them in hopes that he wouldn’t bruise them too much. That duffle bag sure came in handy.
Background paper from an Autumn Collection in my digital files, I think. I used Fairy Sketch and Ink Free from my Fonts library on the PC. The tag is printed on a white base and I was able to 12 to a page and still have room for the registration marks to cut using the Print 2 Cut option in the SCAL software. Tags were cut using the Skycut C24.
Hoping you’re finding some creative time doing something you love! Enjoy! Keep nurturing your soul in a creative way.
A friend asked me to create this for her as part of her Halloween costume this year.
I used a couple of files from Maison Gregoria’s Creative Fabrica collection. You can also find her files on Etsy. The Astria file is pretty small to begin with and I enlarged the pieces by 300% in SCAL. The original coloring was done in Procreate and then printed. I added some embossing on the petals and then added the stickles in purple and some additional inking for a little more depth on each of the petals. The stamen is from the Orchette-Dahlia Paper Template file also enlarged by 300% for consistency. So much fun to put this one together. As a final touch, I added an Easy Light set from Pear Blossom Press to the top set of petals.
Additional Supplies: Distress Inks, blending tool Solar Paste Glitter Stickles White, Green cardstock Hot glue Bearly Art Glue
Hoping your creative time is productive and you’ll find joy in the materials you’re working with as well.
This was a fun project — with just a few tweaks to the original files, this box was a lot of fun to put together.
I used two files from Simply Crafty SVGs. The Easter Egg Gift Box for the body of the owl and the Hovering Witch Hat for the hat. Both files were reduced and can be cut using 8.5 x 11 cardstock. I found a pattern image on Pixabay (the swirls) that I used as a pattern fill on the panel pieces for the body. The dotted pattern on the hat was created in Procreate and used as a pattern fill for the hat panels as well. These pieces were printed, then cut using the Skycut and SCAL software. All pieces were inked for a little more depth and to blend the edges to the base papers that were used. The eyes, nose and wings were created using basic shapes found in the library. I did choose to glue the hat in place and since this is just going to be a decor piece, I also glued the top to the bottom and added a few glass half marbles for a little weight, though it wasn’t essential for balance. This ideas was inspired by some clipart I found on Pinterest. I have a few more ideas kicking around for some additional “birds.” We’ll see how that goes.
Hoping you’ve built in some time in your creative space for the month of October! Have fun and explore a few new ideas and make them come to life…
How about this version? Different colorway. Solar paste and stencils and using an embossing folder. He kind of grew on me…
How quickly September has flown by. The leaves are beginning to turn colors and fall has officially arrived. We’ve enjoyed cool mornings and pleasant afternoons and evenings.
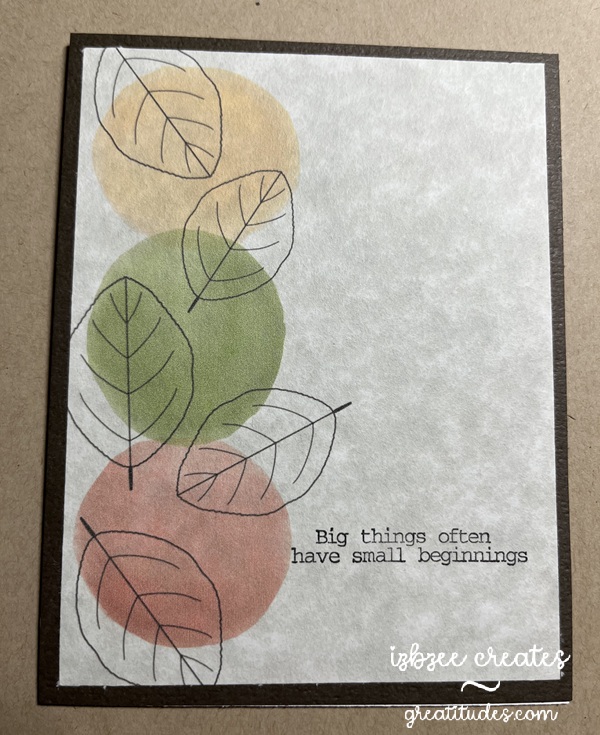
It’s also been fun to create cards using old and new techniques that will be delivered the first part of the month. This first card is the October ministering card. I saw a similar idea on Pinterest — but put my own twist on it using Procreate to “paint” the image using some of the techniques I’ve learned in a couple of online classes. The leaves are a brush from Sandra Createinspain. There were lots to choose from in a recent online offering. The sentiment stamp was found in a collection from Fun Stampers Journey (retired). Using my stamp jig made it very easy to add the sentiment on each card front after printing the main image.
We have two birthdays at the beginning of the month. Mother and daughter. I had a difficult time choosing the designs, but I think ultimately, these will work just fine for them this year. The first card is print to cut — I used Impact font, filling each of the letters with a patterned paper from Creative Fabrica. Each letter is backed with a cut in black paper set slightly to one side to create a shadow. Birthday script is done in Edwardian Script and all pieces are printed using the SCAL software’s Print 2 Cut process. The dry embossed piece is distressed and adhered to a regular A2 card base. The embossing folder is from Fun Stampers Journey (retired). I love using some of my older products! It can be used either vertically or horizontally as used in this card.
Maybe in next iterations, I’ll add some additional inking for a little more texture and depth.
The last card for this post was designed in SCAL 6 – using basic shapes from the library. The flowers and leaves are printed in a base color with additional depth and details added using colored pencils and an embossing tool. The label was created using basic shapes — a rectangle and oval and then using the Mirror Symmetry command under the Effects tab to create the shape – I added some additional details using a Winsor Newton .01 gray pen, a background stamp (Stampin’ Up! retired), and inking the edges after some distressing using an emory board to achieve the desired look. The Happy Birthday banner has been shaped a bit and glued in place before adhering the piece to the panel that was embossed using a Provo Craft embossing folder — another item from the cupboard. I really enjoyed seeing this one come to life — adding additional color to each flower and leaf was a great way to add som more depth and the embossing tool added the texture that made a lot of difference in how the light impacts the design.
As always, the Skycut performed well and each print 2 cut design was spot on! I’ve had the machine for over 4 years and haven’t had to make any additional adjustments to the calibration after the initial set up for my machine!